Aug 8 2023 |
BloodHound Community Edition: A New Era
I’m proud to announce the availability of BloodHound Community Edition (BloodHound CE)!

What you need to know:
- The free and open-source version of BloodHound is now known as BloodHound CE and will remain free and open-source forever under the Apache 2.0 License
- BloodHound CE now shares a common code base and documentation with BloodHound Enterprise (BHE), and each will receive more consistent and higher quality updates going forward
- This release brings several significant improvements to our community including containerized architecture, simplified deployment, a brand new GUI, and more
Compare all differences between BloodHound versions here.
New Architecture, Simplified Deployment
For years, BloodHound was built on a simple architecture: a Neo4J database and a single-page web app running in Electron. While simple, this architecture was also a significant limiting factor in improving the application. We chose to invest in a completely new architecture for BHE and today, we’re bringing much of that architecture to BloodHound CE.
BloodHound CE now has a robust architecture comprised of several front-end and back-end components, including:
- Postgres and Neo4J databases
- A new REST API
- A brand new front-end web application
To enhance the user experience and facilitate seamless deployments, all of these components are now presented in a fully containerized model. Say goodbye to concerns about Java and Neo4J versions, as running BloodHound CE has never been simpler:
Step 1: Install Docker and download our example Docker compose file.
Step 2: Open a terminal to the directory you downloaded the file to and run docker compose up
Step 3: The initial password will display in your terminal. In a browser, navigate to http://localhost:8080/ui/login. Log in with username “admin” and the randomly generated password.
That’s it! By adopting this new architecture and containerized approach, we are paving the way for smoother operations and future enhancements for BloodHound CE.
New Features
There are way too many new features to list in this blog post, but here are a few highlights I’m especially excited about:
Safe Cypher Input
The cypher input system has been completely rebuilt and now includes safeguards against long-running queries and command injection attacks. If you find a way around these, we’d love to recognize your efforts and collaborate on a fix.
Note: these safeguards are built into the BloodHound CE web application and API. These protections do not apply if you query the database directly through Neo4J’s HTTP(S) or Bolt interfaces.
Cached Query Results
Most node-related endpoints will now cache their results, resulting in immense speed and performance improvements. Caches are invalidated after new data comes into the database.
User Management, Multi-Factor Authentication, and SAML Authentication
Create, delete, and manage permissions of users you grant access to your BloodHound CE instance. Reduce risk by optionally enforcing multi-factor authentication (MFA) or tie authentication to your SAML provider.
New GUI
The BloodHound CE GUI has been completely rebuilt from the ground up, using design and components from BloodHound Enterprise. The UX will feel familiar if you’re a current user, but you’ll also notice many significant improvements.
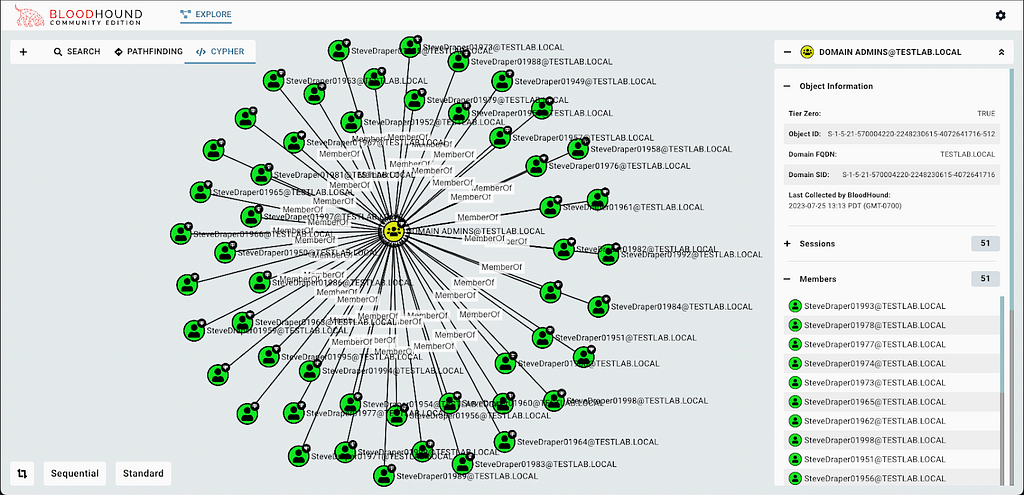
We now use Sigma.js for the graph canvas. Most notably, you will notice dramatically faster graph rendering versus Legacy BloodHound.
In this 30 second video, watch how Legacy BloodHound takes 20 seconds to lay the nodes out, while BloodHound CE lays them out nearly instantly:
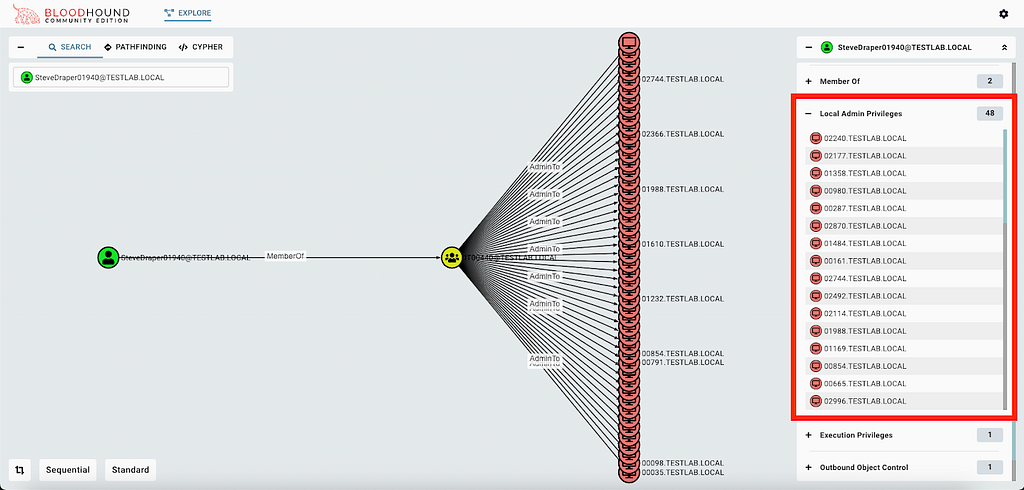
When viewing query results in any node’s entity panel, you will find a convenient list accompanying the graph, providing a clearer understanding of the results. For instance, in the graph below displaying computers with Steve’s admin rights, the entity panel also presents the corresponding list of those computers:
There are too many improvements to the GUI to list here, with more on the way soon!
Introducing The BloodHound API
Everything you see in the BloodHound GUI is served by the BloodHound API. This is an authenticated REST API that accepts and returns JSON-formatted data. The GUI uses the API and you can, too. This opens up exciting possibilities for querying BloodHound and getting back reliable, well-formatted data that can be used as input for other tools.
Our new support site has a dedicated section for working with this API.
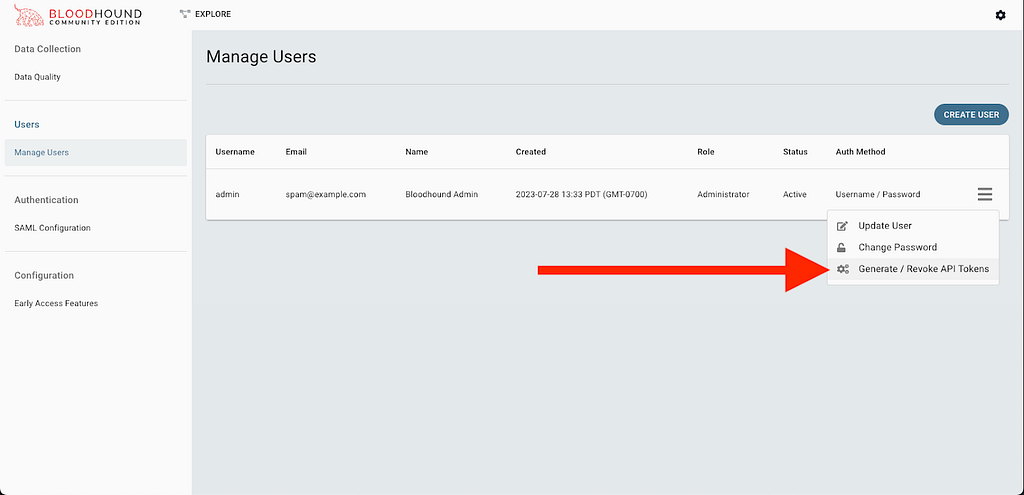
Getting started with the API is very easy. In the BloodHound GUI, navigate to Administration, then Users, then from the user management hamburger menu click “Generate/Revoke API Tokens”:
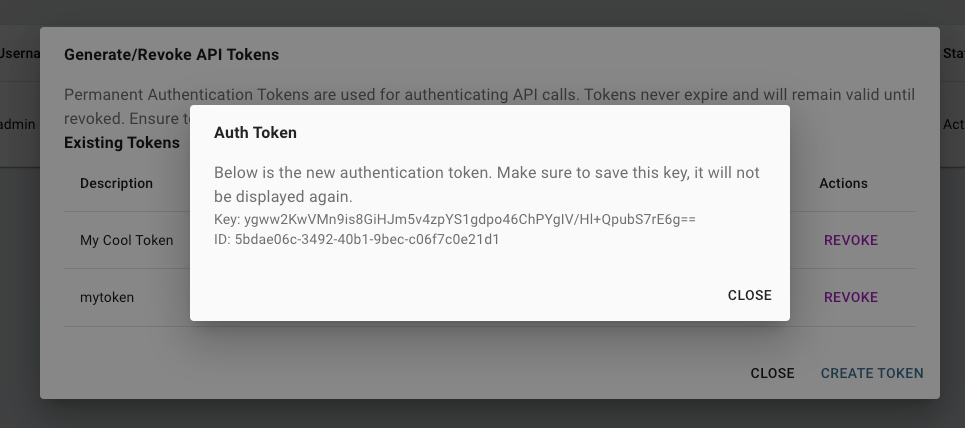
Give your new token a name. The GUI will display the token key and ID. Copy and paste these values, as they will not be shown again:
You can use our example PowerShell API client to query the API. For example, to search for any node where the name or objectid matches a particular value:
$TokenKey = "hzUaufc2GrOu6epNUCRy74Cwp3+GSbTjJXRQFQwF4/WtguGydTqJOw=="
$TokenID = "3e19c487-bf33–43a6–9c1d-9bfee89082ce"

$SearchRequest = Invoke-BHERequest `
 -TokenKey $TokenKey `
 -TokenID $TokenID `
 -Method 'GET' `
 -URI 'api/v2/search?q=STEVE'

$SearchRequest | Select -Expand data | Format-List

objectid : S-1–5–21–570004220–2248230615–4072641716–4171
type : User
name : STEVEDRAPER00168@TESTLAB.LOCAL
distinguishedname :
Or perhaps you want to list the local admins on a given computer:
$ListLocalAdminsRequest = Invoke-BHERequest `
 -TokenKey $TokenKey `
 -TokenID $TokenID `
 -Method 'GET' `
 -URI 'api/v2/computers/S-1–5–21–570004220–2248230615–4072641716–3498/admin-users'

$ListLocalAdminsRequest | Select -Expand data | Format-List

objectID : S-1–5–21–570004220–2248230615–4072641716–6001
name : SteveDraper01998@TESTLAB.LOCAL
label : User
objectID : S-1–5–21–570004220–2248230615–4072641716–5499
name : SteveDraper01496@TESTLAB.LOCAL
label : User
objectID : S-1–5–21–570004220–2248230615–4072641716–5002
name : SteveDraper00999@TESTLAB.LOCAL
label : User
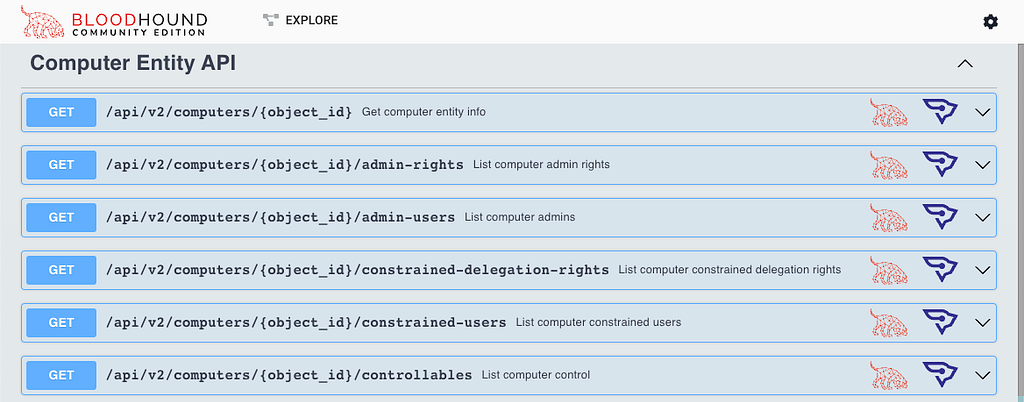
Use the API to feed information to other tools or even to create your own interface for BloodHound. The API is well-documented, with examples of how to call each API available in the BloodHound API Explorer:
What’s Next?
This initial release of BloodHound CE is an early access build. The application is fully functional and stable, but there are a few bugs we know about that we’re working hard to fix, and some more polish we have left to put on the application.
We are very eager to get your feedback. Please join us in the BloodHound Slack or report any issues on the BloodHound GitHub repo.
This release marks a new era for BloodHound CE. We have invested several months of effort into completely rebuilding the application from the ground up, and BloodHound CE now shares a common code base with BHE. This means more frequent updates from us and easier consumption of community contributions. We are thrilled to bring more features to you more quickly in the future.
BloodHound Community Edition: A New Era was originally published in Posts By SpecterOps Team Members on Medium, where people are continuing the conversation by highlighting and responding to this story.